Showing posts with label fresh herbs. Show all posts

Monday, September 8, 2008

Easy enough for a child to make...

What's a great project for a child on a cool fall morning? No-knead rosemary bread, of course!

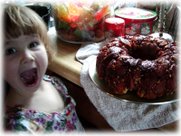
13 year old Monet, 9 year old Sweetheart and 5 year old Baby made their rosemary bread with verbal help from mama, from determining the right temperature of the water (warm, not hot or cold), to the measuring of the ingredients, to the harvesting of the rosemary, to the slathering on of the olive oil (what fun!) and finishing up with the eating of the final product. Monet even improvises a dipping oil which I will have him post for your enjoyment later this afternoon.

In the meantime, enjoy the photos of my previously posted No-Knead Rosemary Bread!


Mixing the yeast into the warm water.


Measuring the flour and salt.


Snipping in the fresh rosemary.

A pleasant goo.


After rising.


Place it in baguette pans, or...

...a cast-iron skillet (or other baking pan/dish), slather with olive oil, then sprinkle with kosher salt.

Snip some more rosemary on top.


Bake until golden brown!

It's not a tall loaf. Think of it as more of a thick foccacia.

Spread with real butter or dip in an olive oil mixture...

...and enjoy!

Wednesday, August 6, 2008

Another No-Knead Recipe: Rosemary Bread

When we host houseconcerts, we ask people to bring along a healthy snack, whether that means a bowl of fruit, a tray of veggies, or their homemade Italian Eggplant Caponata. Often, people will bring their signature dishes, and it's not unusual to find the kitchen butcher-block buffet heavy with likes of a fabulous vegetable curry, espresso chocolate chip cookies, homemade cheeses, and delicious breads.

During one particular concert, the musician made a point of thanking the guests for loading him up with such exceptional foods, and he said that he didn't want to exclude anyone, but that the rosemary bread was just to die for. Indeed it was. It took me a while to ask for the recipe, but now that I have it, my rosemary plants are in danger of being stripped bare.

This is similar to Daniel Lahey's No-Knead Bread, but this one requires no kneading at all and only takes a little over two hours, start to finish, to make. I can imagine you could use other herbs, if you like, and I plan on trying it out with basil, tarragon or oregano.

This dough is extremely wet, so if you end up with a big, gooey mess after the mixing and the first rising period, you haven't done anything wrong. Just grease up your hands before you pull the mass from the rising bowl, and make sure you oil your baking pan well before slopping the dough onto it. Make two batches. You'll be glad you did.

#`~~`~`#3#3###----#`~~`~`#3#3####`~~`~`#3#3###`~`~~`#

No-Knead Rosemary Bread
Courtesy of Sonia S.
(makes 2 loaves)

2 cups warm water
2 teaspoons instant yeast
4 cups flour (I use bread flour, but you might be able to use all-purpose flour)
2 teaspoons salt
Extra virgin olive oil
A handful of fresh rosemary, hard stem removed and chopped
Kosher salt

Mix yeast and water in large bowl. In a separate bowl, stir together flour, salt and a small handful of chopped rosemary. Add to yeast and water. Blend with a spoon until mixed and the dough pulls away from the edges of the bowl (will be gooey). Cover and let rise for 1 hour, 20 minutes. Grease a cookie sheet or two-loaf baguette pan with olive oil. Grease your hands and dump the dough into two loaves, forming rough elongated loaf shapes with your hands. Pat with olive oil, sprinkle with chopped rosemary and a dusting of kosher salt. Bake at 350 degrees for 20 minutes and then at 375 degrees for 20 minutes.

Serve with delicious pesto, butter, or olive oil mixed with fresh basil, crushed red pepper, crushed fresh garlic, a bit or oregano and kosher salt to taste.

Let me know what you think!

Friday, July 4, 2008

Genovese Basil Bread

On a cool, rainy holiday when Toby is out working on the cabin and the garden weeds will wait until the sun comes up, baking bread is at its best. And when there's an abundance of basil in the garden, that's the time to make Genovese Basil Bread.

This recipe is made in a similar fashion to french bread, so you'll roll out the dough with a rolling pin and then roll each piece up jelly-roll style.

The recipe makes four small baguette-type loaves, so if you've got a hungry clan, you'll want to make several batches!

_o_ooo-*-***_o_ooo-*-***_o_ooo-*-***_o_ooo-*-***

Genovese Basil Bread

2 Tablespoons Olive Oil
2 Cups Fresh Basil Leaves, coarsely chopped and lightly packed
1 clove garlic, minced
1 package dry yeast
1 cup very warm water (105-115 degres F)
2.5 to 3 cups bread flour, plus a bit more for dusting
2 teaspoons salt
1/8 teaspoon freshly ground pepper

Heat oil in a heavy, large skillet (I love my cast iron skillets!) over low to medium heat. Add basil and garlic and stir for 1 minute. Remove from heat.

Dissolve the yeast in water in a small bowl. Let it stand for ten minutes.

Mound 2.5 cups of flour onto your work surface or in a large bowl (I use my stand mixer); make a well in the center. Add the dissolved yeast, basil mixture, salt and pepper to the well. Mix the ingredients that are in the well, and then incorporate the flour. Knead on a lightly floured surface until it's firm and elastic, adding a bit more flour if it's sticky, for several minutes (on 4 on your KitchenAid stand mixer for 10 minutes).


Place the dough in a large, oiled bowl, turning once to coat with oil, and then cover it to let it rise until it's doubled, about 45 minutes, depending on the warmth in the rising space.


Grease a baking sheet. Punch down the dough. Knead it on a lightly floured surface until it's smooth, about three minutes. Cut the dough into four pieces (or two pieces, for a longer loaf) and then roll one out on a lightly-floured surface to an 8 x 5 1/2" rectangle (longer if you're making two loaves instead of four).


Roll it up jelly-roll style, starting at one long end. Transfer to the greased baking sheet, seam side down, then do the rest of the pieces the same way. Cover and let rise for about 30 minutes, until the pieces are doubled.

While they're rising, preheat your oven to 450 degrees farenheit.

When the rolls have risen, slash them from one end to the other with a serrated knife and a confident hand. Bake them for about 30 minutes, or until they're golden in color and sound hollow when you tap on the bottom of a roll.

Voila!


And a finished product! Yes! Delicious with REAL butter!

Thursday, July 3, 2008

Growing!

The season is flying by, and the garden is shooting up! And even though there are a few snow peas on the vines, and I made my first chocolate zucchini cake of the season, and there are a few blossoms on the nasturtiums, I don't really feel like the garden is "ready" until the tomatoes are ripe and plump and plentiful.

But that doesn't mean the garden isn't plentiful already! It's bursting forth with loads of hollyhocks, tarragon, mint, parsley, swiss chard, rosemary and just the beginnings of a large crop of basil. The lettuce season is just about over, as is the broccoli and cauliflower, but I have yet to see a brussels sprout or eat a green bean, so we still have a long way to go (though I do see the sprouts starting to form and there are little tiny beans on the bushes!).

What else is in the garden?

Red Raspberries and Yellow Squash...

Plums...


Peaches...


Container Swiss Chard...


Hollyhocks and Scarecrows...

Radish-flavored Nasturtiums...


Lots and lots of tomato blossoms, and a few little bugs...

Bees...

And more bees...

Enough basil to feed and army...


Mammoth Snow Peas...


Climbing Nasturiums (well, you can't see them *yet* but they'll be there before you know it!)...


Red beets, yellow beets, cantaloupe and watermelon...


Fennel and flowers...


More and more and more zucchini (Did you ever hear the defnition of a person without a friend? Someone who has to go to the store to buy a zucchini!)...


And there's also Asian pears, kittens, blueberries, okra, pigs, eggplant, chickens, some heirloom melons, puppies, lots and lots of flowers, herbs and, of course, children. :-)

Sunday, May 11, 2008

My Current Obsession: Greek Yogurt!

I recently started a food buying club at our church, and I've already found it to be worth it.

One of the ladies there ordered some Greek Yogurt, and I decided to give it a try. I wasn't sure if about it at first, because I'm a big fan of Stonyfield Farm's Whole Milk Yogurt, but I was willing to give it a shot after my friend's glowing review.

She had described it as almost like the kind of yogurt you get when you strain plain yogurt through a cheesecloth. She was right, but the taste of the plain Greek yogurt is more like tangy sour cream. As a matter of fact, that's how I've been using the plain--like sour cream. We've used it for dipping homemade potato chips, for a replacement for sour cream in cheesecakes, in muffin recipes, and every morning in our scrambled eggs.

For years, I've made scrambled eggs with a couple dollops of sour cream added during the beating process. Last week, I decided to give the Greek yogurt a shot, and the recipe got rave reviews. It adds just a hint of tang and creaminess to the eggs, but the most important thing is that it makes the eggs light and fluffy, and they retain the moisture and warmth much longer.

Here's how it's done...

Scrambled Eggs with Greek Yogurt

6 farm-fresh free-range eggs (if you can get them)
a handful of garden-fresh chives, chopped
2 tablespoons plain Greek yogurt (the brand I've been using is The Greek Gods)
A dash of salt
A dash of pepper

Beat the eggs, and then add the chives, yogurt, salt and pepper. You can also toss in just a smidgen (maybe 2 teaspoons) of fresh chopped tarragon.

Heat a cast-iron skillet (or other skillet) and melt a tablespoon of butter, swirling it around to cover the bottom of the pan.

Pour the eggs into the pan and cook over medium heat, scraping the bottom of the pan to make sure the eggs don't stick.

Cook until the eggs are all soft and fluffy.

Serve immediately with English muffins or toast.

You can add the greek yogurt to your other egg dishes, too, like fritattas or omelets.

Give it a try and let me know what you think!

Tuesday, May 6, 2008

Awesome Marinated Chicken

The time this takes is the overnight marinading, but there couldn't be anything simpler. Or tastier! The perfect grilled chicken for a sunny Spring day.

**..**=_=-=_=**..****..**=_=-=_=**..****..**=_=-=_=**..**
Awesome Marinated Chicken

Boneless chicken breasts
1/3 cup white wine
1/3 cup olive oil
1 tablespoon Dijon mustard
1 tablespoon fresh rosemary (or 1 teaspoon dried, but, trust me, you'll like the fresh stuff better)
1 tablespoon fresh marjoram (same as above)
2 teaspoons fresh thyme (or 1 teaspoon dried)
1-4 cloves of minced garlic (garlic to taste)
salt
pepper

Combine all of the ingredients in a zip-type bag. Marinate overnight. Grill on medium-heat charcoal grill about six minutes per side. Serve with a delicious vegetable, like fresh asparagus!